Showing posts with label oil painting. Show all posts

Thursday, August 16, 2018

VOTE!


Siempre En Movimiento
2017
Acrylic, Latex Paint, Color Pencil, Marker and Oil on Canvas
30 x 40 inches

Hi everyone, I have been very busy, per usual, in getting ready for shows and completing commissions. My painting Siempre En Movimiento has been accepted into the XL Catlin Art Competition and will travel part of the show to San Francisco Art Institute, then to Chicago at the Linda Warren Projects Gallery, and finishing at the New York Academy of Art. You can get more information about the competition and show by clicking here.  

My painting, Siempre En Movimiento, is currently up for an audience aware on their Instagram page. All you have to do is like the painting. If you have Instagram go to @xlcatlinartprize and my painting should show up as their latest post. You can only like the painting between today8/16 and tomorrow 8/17. I appreciate all your help. Spread the work if you can, the more the better!

Thank you, everyone! 


Tuesday, February 23, 2016

Master Copy 2

Sold
"Nicolas Lanier after Van Dyck"
11 x 14 in
Oil on Canvas Panel

Here is another master copy I attempted after Van Dyck. Practice makes perfect and I enjoy practicing as much as I can with this technique. I have been noticing how valuable the under painting is. In the under painting stage you get all proportions and values correct, this is important when applying color in subsequent layers. It allows you to not worry about proportions or drawing and more on texture or the look you're going for. I strongly recommend trying this technique or at least doing a master copy. 

Drawing
I started by drawing the shadow shapes and important landmarks. I used raw umber and no mediums. You can use a little bit of mineral spirits to make the paint glide to your liking. I tend to not use any mineral spirits and very minimal paint, almost as if I was scum-bling the paint.

Shadow Shapes Fill In
This stage I only use raw umber with 2 parts mineral spirits and 1 part linseed oil. (Not sure why the picture show the canvas warmer than it should be.) 

Under Painting
This is where most of the painting starts coming together. Spend as much as time as you need to get this stage correct. The objective is to get the values, drawing, and proportions right. Most of your painting is completed in this stage. You can start on this stage right after filling in the shadow shapes without leaving it to dry. I use 1 part of linseed oil and 2 part of mineral spirits. I am only using raw umber and white for colors.

1st Lay In
After the under painting is completed then I start glazing color. I use 1 part mineral spirit and 1 part linseed oil. Do not use a lot of paint on the brush, glaze the color to match the value that is stated in the under painting. Start this stage once the under painting is completely dry. The point of this stage is to match chroma to the value in the under painting. As stated before keep the paints fairly thin as later stages it will be thicker. Colors I used were raw umber, cadmium orange, napthol scarlet, burnt sienna, naples yellow, ivory black and titanium white. I start painting the shadows shapes first by painting the colors that belong in those specific areas. I start using ivory black to indicate the darkest dark. Once that is completed I move onto the light shapes. I started on the edges where light shapes meets with the shadow shapes. I start indicating the middle to lighter values of the chroma in the correct areas. The paints are really thin I do not put much paint on the brush which allows me to control the value and chroma. The way I paint with the brush I usually start by scum-bling back and forth without lifting from the canvas. When doing this I am only concerned of laying the paint down and not about detailed areas as it does not give me enough control to do so. Once I need to get more specific with the blends and achieve certain texture I then start to dab the brush. When dabbing I always start with a soft approach on the amount of pressure I am applying to the brush. If I press too hard in the beginning its going to give me to much paint and a stronger chroma. Its the same idea when drawing with a pencil, its all about handling it with sensitivity. 

2nd Lay In
I let the painting dry before starting this stage. You can oil out the darker areas if you need an accurate judgement of the overall values. Again I started with the darker shapes doing a final pass of ivory black. Then in the light shapes I paint in all the subtle textures in the skin tones. I indicate the highlights in the eyes. I do not use any mediums at this stage. If you do use medium just use linseed oil and no mineral spirits. I am using the same colors as stated in the previous stage. I am using very  minimal paints for certain areas. I am not scum-bling the paints as this will give it a chalky look in this stage. I am dabbing the colors to get the right texture and feel I want. As stated before I think of this as I am rendering with a pencil. The amount of pressure will dictate the value and chroma of the color. 

I challenge everyone who reads this to try it out. Very interested to see what you guys produce.


Friday, June 19, 2015

Ivan Kramskoi Study

"Ivan Kramskoi Study"
10 x 8 in
Oil on Canvas Panel

I posted this one a couple years ago and completely forgot I had it. I found it in the closet and decided to part ways with it. If interested in buying this painting click here to bid on it.

Cheers!

Tuesday, June 16, 2015

Peonies

Sold
"Peonies"
8 x 10 in
Oil on Canvas Panel

I have posted this painting before but have not offered it for sale. If you are interested bid on it through my ebay page.

Cheers!

Monday, December 1, 2014

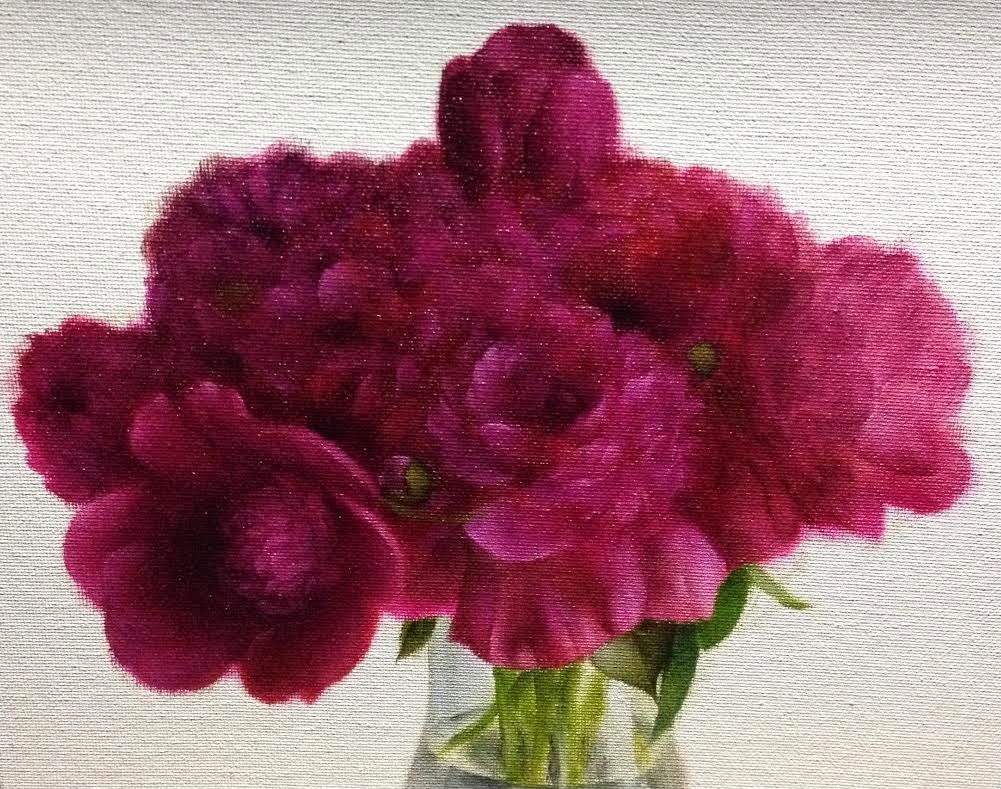
Fuchsia Peonies

Sold
"Fuchsia Peonies"
8 x 10 in
Oil on Canvas Panel

I am well aware Peonies are out of season, These peonies I bought for my wife a while ago and loved how they looked. I took a picture and always said "I will paint that one day" well that day finally came.  The texture and movement within these flowers are spectacular, I tried so hard to portray that in my painting. Fuchsia Peonies are always fun to paint due to the purples, blues and reds that are hidden within each pedal. The movement from one petal to the other has a beautiful gestural quality to it. It is a challenging flower to paint but always rewarding in the end.

Thanks for stopping by, cheers!

Wednesday, November 26, 2014

Leaning Gourd

Sold
"Leaning Gourd"
8 x 10 in
Oil on Canvas Panel

Since the holidays is around the corner I wanted to paint a festive theme. Some people might argue pumpkin is not very festive for this time of year, which is a valid point but I think the colors are fitting.  I want to thank everyone who stops by my blog and takes the time to look at my work. Thank you for doing so. I enjoy sharing my process and thoughts on painting. I know the journey of learning this difficult medium can be long and stressful, if I can share my knowledge to help some people with their journey then I feel I have accomplished something. I am so grateful for the artist I reached out to when I started out on my journey for helping me. I wanted to create a blog where I can do the same and share my knowledge as best as I can. We are all on the same boat trying to decipher this complex language of painting.  Thank you everyone and Happy Holidays!

I started with a thin application of raw umber for the drawing stage. Once the drawing is complete I paint the background and wooden board. I keep colors general in this stage and really thin. 

I start painting in darker value forms to the wooden board. Once that is complete I paint in lighter value forms.

Once the wooden board is complete I start painting in the pumpkin. I first lay in a thin application of the general values, somewhat a big form modeling stage. I go back and forth with the brush without lifting it, I keep the pressure pretty light to control the values. Once that stage is working well I move onto the smaller middle to darker value forms. I apply the paints a little thicker to cover the thinner application but being careful of not getting to thick. I am also conscious on the pressure I am applying to the brush. At this stage I start dabbing the brush for the areas that need finer rendering and when the edges need to get softer I go back and forth with the brush with a very light touch. I like to go back and forth with dabbing and keeping the brush on the canvas. Usually in the later stages I tend to lightly render the areas by dabbing on the brush and then going back and forth with out lifting the brush. This approach allows me to control the values and the level of rendering, it also gives me options with the type of textures I am trying to get. 

I then paint in the middle to lighter forms in the pumpkin. I apply the same rendering approach as mentioned above. Once the pumpkin is complete I start painting the gourd. I first paint the big form modeling by painting in the general values wrapping around the form. At this stage I am not worried about the smaller forms or "details". I am just worried how the value and chroma wraps around the form. 

Once the big form modeling is working well I then paint the smaller middle to darker values forms. I then do the same with the smaller middle to lighter value forms. 

I hope everyone has a wonderful holiday! Cheers!


Tuesday, November 18, 2014

Forelle Pear

Sold
"Forelle Pear"
5 x 7 in
Oil on Canvas Panel

I haven't painted pears in a while and thought it was time to re visit these beauties. I also wanted to go back on how I painted pears when I first started to do alla prima paintings a couple years ago. It's minimal amount of paint on the brush kind of like drawing with a pencil, you do not want to put a dark hard line with the initial mark. This painting is an exploration of my technique old and new.

I started with a thin application of raw umber for the drawing stage.  I am not worried about details just the placement of major shapes and the lineation of shadow shapes. Then I painted the background in. I usually like to paint this area first, this allows me to now worry about it when I am painting the main object in the painting.

Once the background was filled in I then painted in the wood, I applied a thin amount of paint to cover the base. I think of it as how one would when drawing with a pencil. I do not paint in the darkest darks or lights lights, just an in between value to give form to the object. Then I paint in the darkest values. I still have not applied any lighter values just concentrating on the middle to darker values.

Once the darks are painted I then start to paint in the middle to lighter values. Once the base is at a level I am satisfied with I move onto the pear. The initial stage of painting the pear I apply a thin layer of paint in the shadows, I do the same with the lights. In this stage I am only concentrating on big form modeling, how light wraps around the form. I mesh the lights into the darks to make the form turn, softening edges to show more of the turn. I am not worried about details at this stage just worried on applying a thin layer of paint and making the form turn with generalized colors.

Once big form modeling is working I then start to work on middle to darker values. As I mentioned before I am applying the paints very thin, this allows me to control values the same way one would control a mark with a pencil. I like to build into my darks as well into the lights.  This approach is time consuming but gives you control on how much subtle values shifts you're needing.

Hope you enjoyed this painting, thank you for stopping by! Cheers!

Monday, October 27, 2014

Pumpkin & Gourd

"Pumpkin & Gourd"
4 x 6 in 
Oil on Canvas Panel

I wanted to stay on the theme of gourds and include a pumpkin. I couldn't just leave the gourd by itself, included the pumpkin as a central focus with a dominating presence. The story can go many ways when reading into the painting, its definitely behold of the viewer.


I started with a dry brush approach by just using raw umber and no mediums. In this stage I want to get the drawing as close as I can get it. When I start painting I want to make sure the drawing is as close to it as possible.

Once the drawing is complete I painted in the background and wooden base with its local colors. Once I painted the local colors in I painted the lighter values in the wooden base to give it more form. I want to take the wooden board to a close finish this will allow me to concentrate on the pumpkin and gourd and now worry about coming back and finishing it.

Once the wooden board is complete, I started to lay in local colors on the pumpkin and gourd. I apply a thin coat of paint trying not to go thick, remember fat over lean. In this stage I also paint big form modeling with the local colors. This allows me to concentrate how light wraps around the form. I am not worried about the smaller forms or "details" just how light wraps around the form. I am also keeping the values in a middle tone, not going to light or to dark. I'll apply the dark's and lights in the smaller form stages. I like to spend a lot of time in this stage getting it right, if it works well in this stage then the subsequent stages will go by smoother.

Once the local colors are working with the big form modeling, I then start to paint the darker smaller forms. I start to apply the darkest tones as well in this stage which will make certain sections look brighter.


Once the darker smaller forms are complete I then paint the lighter smaller forms . I repeat the same process as I did with the darker forms by putting in the lightest values. 

Hope you enjoyed this one, thanks for stopping by!

Friday, October 24, 2014

Portrait Sketch

Sold
"Edward"
8 x 10 in
Oil on Canvas Panel

I painted this portrait at my Thursday evening figure drawing class. The portrait was completed in 4 hours. I love teaching and when I am able to draw/paint next to my students it's just a dream come true. I remember being in class at Ringling College of Art and Design and my favorite figure drawing teacher, Fiore Custode, used to teach us and draw next to us. Really enjoy when I am able to do the same. 


I am teaching at the Bloomington Art Center on Thursday evenings from 6:30 - 9:00 p.m. If anyone is interested click here to get more information.

Cheers!


Wednesday, October 22, 2014

"Kat" Figure Study

"Kat"
8 x 10 in
Oil on Canvas Panel

I have not painted from the figure in a while, so when the opportunity came up, I jumped on it. I have been doing most paintings from imagination lately.  It was nice to have a break from that, and paint from the figure. This painting was completed in 3 hours in a smaller size than my usual figure paintings. I enjoyed painting this figure in a smaller size since it allows you see the values as a whole. First, I drew the figure with a dry brush articulating each shape as simple as I can. Then I applied a middle base color for the shadows and the lights.  I attempted to paint in the middle tones and not get too light or too dark.  This allowed me to go in either direction when adding smaller and subtle forms without getting too muddy. Instead of starting with the darks after laying the middle values, I painted smaller forms into the lights. This allowed me to shape the form and address textures along the figure. I did the same with the shadows once the lights were complete. What I enjoyed most about this piece was playing with different skin textures on such a small scale. 

Thank you for stopping by, cheers!


Wednesday, April 18, 2012

"Green Vase"

Sold
"Green Vase"
6 x 6 in 
Oil on Canvas Panel
Today I saw this vase around the house and saw how much I liked the way it looks on these wooden panels.  There's no particular explanation why I chose to paint this just the sole purpose of getting inspired by what I saw at that moment.  It's great being able to pick up the brush and just paint what you see, I was not planning to paint today but I did see this vase and how the light was hitting it and just had to.  There's beauty in everything we see I know it sounds cheesy but its very true, it can be the most mundane thing and it still has some beauty to it.  It just matters how one perceives what he or she is looking at.  
I started with the usual dry brush approach of using just a bit of raw umber on the brush for the drawing stage.  After the drawing stage I stated the local color in the vase by using viridian, cadmium yellow and raw umber.  When stating the general colors I am also stating the big form modeling, i'm not stating the extreme values of the darkest and lightest values just a close approximation to get a base down.  The extreme shifts of values I leave towards the end of smaller form modeling.
Then I start stating the middle to darker value within the vase, this is where I start stating the darkest values to get the point across that the form is turning.  Then I state the lighter values with their specific forms, this stage I also state the highest value or highlight to tie it together. 
After the vase is done I moved on to the background and stated the base and background together.  I used ultramarine blue, raw umber, naples yellow and titanium white for both.  I hope you enjoyed this simple and quick painting, thanks for stopping by and viewing.


Monday, April 16, 2012

"Ranunculus"

Sold
"Ranunculus"
8 x 10 in 
Oil on Canvas Panel
I haven't painted flowers in a while and wanted to paint these, I gave these ranunculus to my girlfriend and decided after a couple days that I needed to paint their beauty.  I've been busy painting larger paintings and producing ball point pen drawings so it was nice to change the pace to these alla prima's.  After not painting alla prima's for a while it was tough to get started and find a rhythm, after half way through it started to click and come back to me.  I really do miss painting these guys on a daily basis but at the same time I like devoting most of my time to my larger more personal work.  The sole purpose of these alla prima paintings is for practice and try to understand the oils as best as I can.  Painting flowers are a bit different than painting a regular object in a still life, first flowers move by the hour and second their form is far more intricate and complicated.  I found painting flowers you have to simplify their shape as much as you can and towards the end of the painting stages thats where you can get complicated with the rendering.  Overall it's a joy and pleasure to paint a beautiful subject matter as this.
I started with the usual dry brush approach by just applying a bit of raw umber on the brush and using no mediums.  When the drawing is completed I then stated the background and after the general statement of the flowers and vase.  At this stage I just lay in a thin layer of paint which creates a nice surface for the oils in the later stages.  I am also concerned of the movement of light at this stage, big form modeling if you will.  I used ultramarine blue, naples yellow and titanium white for the background.  For the roses I mainly used quinacridone magenta for the initial stages, and for the leaves and vase I used viridian and naples yellow.  I usually don't lay out my colors all at once because I like the keep the paints fresh in every section I work in, I do know with certain colors you are able to get away with that instead of having a dry look towards the end of the painting.
Once the big form modeling was complete I then started to just concentrate on individual sections, I choose the first left roses to paint.  First I stated the darker values with their specific shapes, the colors I used were quinacridone magenta and ultramarine blue for the darker values.  Once the darker shapes were complete I moved on to the lighter shapes and stated their specific forms.  I used titanium white mixed with quinacridone magenta for the highlights and lighter values.  I repeated the same process with the middle set of flowers
As you can see its the same process when stating the lighter values after the darks are complete.  It usually flows nicely when you complete each stage well,  there are at times were you do have to go back and adjust certain things to get the overall value or paint quality right, just depends on how the look of the object your painting.  I repeated the same process with the third set of flowers on the right side of the painting.
Once the flowers are complete I moved onto the vase and stating the middle to darker values, the colors I used for this stage were viridian, and ultramarine blue.  This area is a good lesson in not painting every hair on a dog to get the point across that theirs a lot going on, as long as you paint a representation of the form and whats going then your find getting away with it.  If I was to paint every single strand of stem and leaf then it would start to come out bland.  You have to choose your battle and see what information is important to leave in their when you paint, what will help you'r painting out if you were to leave that out or push it more in order to get the message across.  Remember your the director of this frame you can choose what the viewer see's and feels.
I finished the painting by stating the small stems poking out of the flowers.  I hope you guys enjoyed this one, I know I did and hope to do more in the near future.  Thanks for stopping by and viewing!


Thursday, February 2, 2012

"Blood Oranges II"

"Blood Oranges II"
6 x 8 in 
Oil on Canvas Panel
Today I wanted to paint these beautiful blood oranges again but this time with a red cloth.  As I've mentioned in previous posts I really enjoy trying to capture the texture of things, today was definitely one of those days were it tested my abilities to do so.  From the wrinkles of the cloth to the soft subtle tones in the oranges and to the grainy wooden board.  All of them unique in their own way but meshing well together.  I was also able to mix my older approach to my new one of course shifting things here and there, for the most part I was pleased the way they worked together.    
I started with the usual dry brush approach just using a bit of raw umber on the brush and no mediums.  Once the drawing was established I painted the background and the back section of the red cloth.  The colors I used for the background were ultramarine blue, titanium white and naples yellow.  For the red cloth I used naphthol red, cad. red, raw umber and ivory black.  When working in the cloth section I start by just laying in the values with their appropriate colors to match the hue.  I keep the transitions soft and make sure to not have any hard edges, this is my beginning layer and want to keep it as thin as possible.  
Then I start by adding the darker values and their specific forms, by doing this I start sculpting into the initial layer.  Once the darker forms are about complete I then paint in the lighter values with their specific forms.  By now I start to see the section coming to a completion, I start going back and forth from the darker values and pushing it to compliment the lighter values.  
Then I repeat the same process with the red cloth in the middle ground.
Once that section is complete I then move onto the first blood orange.  I start by painting the big form modeling in which the light is wrapping around the form.  Laying in a close approximation were each value scale should go with the right chroma to compliment it.  I also make sure to keep this stage of the painting thin, making sure the form is turning and it looks dimensional.  The colors I used for this section were cad.orange, cad.yellow pale hue, naphthol red, raw umber and ivory black. 
Once the big form modeling is complete I start to state middle to darker values with their specific forms.  When adding the smaller forms in this section I am able to use the initial layer that I stated in the big form modeling stage, this helps my blends go smoother and quicker it keeps a unified look.  It also allows me to go thicker and textured if desired to do so, it gives me the control i'm looking for within each section.  Once that section is about complete I start on the lighter values and highlights.  By the time I get to the end of this stage I am able to go back to the previous section,  I alter some values and chroma's that I didn't notice when the lighter values were not painted.
I repeat the same process with the second blood orange.
Once the blood oranges are complete I then start on the on the wooden board.  First painting the fall of light by keeping the values and colors generalized.  At this stage i'm not looking for details just a generalized information of the light and color.  I also make sure to keep this stage as thin as I can, doing so makes it easier to build layers and keep control.  The colors I used for this stage were raw umber, titanium white, ultramarine blue, cad.orange, and ivory black.
Then I paint in the middle to darker values with their specific forms, I start narrowing in the smaller forms by adding its specific characteristic.  I do the same when adding the lighter values and highlights.  After this stage is complete I go back around and see if I need to push anything or if I've missed a certain part.  I go back into the background and grey it down a bit, I thought it was competing with the foreground for the most part.  Well this painting definitely was a longer one to explain with each of its intricate sections.  It was so much fun painting them and also being able to explain each section, thank you for stopping by and viewing.