Showing posts with label Cherries. Show all posts

Thursday, July 28, 2011

"Cherries & Marble"

Sold
"Cherries & Marble"
5 x 7 in
Oil on Canvas Panel
Cherries on marble have a great look to it I was beyond excited to get this painting started when I paired them up.  The slick smooth surface on the cherries I think meshes well with the rough textures on the marble, I also like the shine on the cherries.  As stated before painting marble is very challenging but glad I keep doing it because it teaches me something new every time.  Looking at these cherries for such a long time while painting them was torture for not being able to eat them, needless to say when I finished painting them I enjoyed every bite of it. 
I started with the usual dry brush approach using no mediums and a bit of raw umber on the brush, then I  stated the background and middle value to the base.  I keep the paint fairly thin at this stage this allows me to control the values from the beginning.  Then I start on the front part of the marble just concentrating on the middle to darker values first, I don't just paint the darkest darks first I slowly build up to it.  The colors I used where cerulean blue, ultramarine blue, titanium white, naples yellow, and ivory black.
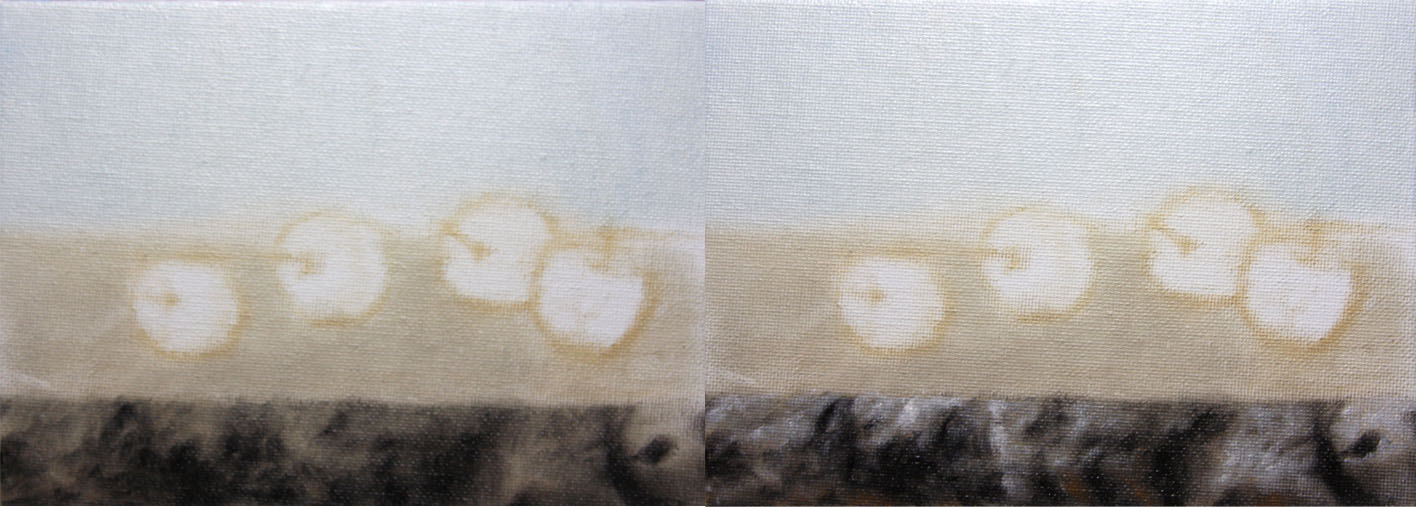
Once the middle values where working and had a map of where to put the darker darks I then stated the darkest values and their specific forms.  Once that was complete I stated the middle to lighter values, I repeat the same process as I did when starting to state the middle darker values.   I like to slowly progress to the lightest and darkest values this allows me to control the blending and textures I'm going for.
I repeat the same process for the top of the marble.
Then I start cherries all at once just stating the middle values, I like to lay in all the general colors in the cherries at this stage.  Once thats complete I start on the first cherry stating the middle darker values and building up to the darker values with their specific forms.  Then I start on the middle to lighter values and  progress to the lighter values with their specific values.  The colors I used for the cherries are alizarine crimson, cad. red light, cad. yellow light, and ivory black.
I repeat the same process with the second cherry.
And do the same with the third and forth cherry.
Then I completed the fourth cherry then went back into the marble and took the cast shadows to a finish. As stated before its very challenging to paint marble and glad I did so, I learn so much every time I paint it.  I recommend anybody who wants to learn how to render different types of textures in one plain should definitely paint marble, its a great learning experience.  I hope you guys enjoyed this one, thanks for stopping by and viewing!


Friday, May 27, 2011

"Bagged Cherries"

Sold
"Bagged Cherries"
10 x 8 in
Oil on Canvas Panel
This painting was so much fun to do, its completely different than what I would do.  Painting a clear bag is something that seems to intimidating to paint, it's so complex in many ways.  I decided to just go at it with this painting and see what I can do and push myself out of my comfort zone.  Painting these cherries where so much fun, with this painting I was really able to show more of the beautiful colors these rainier cherries have.  I have to say that was the funnest part of the painting, painting so many cherries at once was a bit much to do but a lot of fun and glad I did so.  Not to say the other areas weren't fun, its just the cherries are in their own level.
I started with the usual dry brush approach using no mediums and just a bit of raw umber.  Then I started on the cherries all at once just stating the general colors, I'm not stating any of the darker and lighter tones yet.
Then I start stating the middle to darker values not going to dark yet I wanna slowly get to the real darks, this way I'm able to control the values from light to dark.  The second picture shows that I stated the darker values and also added the stem to the cherries, I've also added the cast shadow to the base to have a point to work on when I start on it later.
Then I state the lighter values and their specific forms, at this stage I'm able to take the cherries to a finish.  Then I start on the wooden base by adding the general colors and also the fall of light.
Then I add the darker values and their specific values, I do the same with the lighter values and take the cutting board to a finish.  After the cutting board is complete I then fill in the background, since I'm painting a see through bag I can just cover the whole background at this stage.
Then I start adding some of the middle values to give the impression of the bag, then I add highlights and the middle values.  Painting this bag was something I've never done before especially in one sitting, it was a challenge that I'm glad I did.  Painting a clear bag has so many obstacles to it but I found if you keep it simple then its not to complicated.  When painting the bag I made sure to soften the edges around the cherries to push some of them further away.  I had a lot of fun painting this one a bit different than what I usually do, great to get out of my comfort zone and see what I can do.  Thanks for stopping by and viewing, hope you enjoyed!  


Wednesday, May 25, 2011

"Saving Cherries"

Sold
"Saving Cherries"
5 x 7 in
Oil on Canvas Panel
I've been so busy lately with other paintings its good to step a way and pump one of these out through out the day.  Especially now since I know with the holiday coming up I won't have time to paint, which means i'll be twitching for a couple days feening to paint.  I was at the grocery store today and could not walk away from these cherries, I guess since spring is here and summer is around the corner they are just everywhere.  Here in Minneapolis spring is short lived because of our long winters sometimes we just jump straight into summer, but everyone once in a while spring pops up and its just beautiful outside.  Thats one of the things I really appreciate living up here is seeing the change of seasons and how beautiful it is, being born and raised in Miami, FL I only know one season summer.  Cherries are always a favorite of mine to paint, their deep reds and smooth surface always brings me back to them.  They are deceiving though they seem simple to paint but they have their challenges, the intense red and subtle value shifts make it tricky to paint.  A good challenge for someone if they want to learn how to paint smooth surfaces and subtle value and chroma shifts.  
I started with the usual dry brush approach using no mediums and just a bit of raw umber on the brush.  After the drawing is complete I start on all the cherries treating them at the same time in each stage, I first  lay in the general colors and try to do some big form modeling.
Then I add darker values and its specific forms and do the same with the lighter values.  In this stage i'm constantly going back and forth between values and adjusting it to the right look i'm going for, I take it to  a close finish and move onto the base.
With the base I start by laying general colors and the fall of light across the base, I'm not worried about details at this stage just getting the overall statement of colors and light.  Once that's working right I start by adding the darker values and its specific forms, I add the middle darker values as well and take both values to a finish.
Then I add the lighter values to the base and take the whole base to a finish.  Once the base is complete i'm able to concentrate on the background, I first start by treating the edges where the cherries meet the background.  I have to be careful in not contaminating my background color with the reds of the cherry, I also play with the softness of edges all around with the cherries and base.  After the background is complete I go back into the cherries and add some finishing touches here and there and take the whole painting to a finish.  That's one of the reasons I like to take the main object I'm painting to a close finish in the beginning, once all the other areas are painted the main object might look different in value and chroma.  Leaving room to adjust certain parts of the painting in the end is a good thing to do, never know if you do or don't need to do it better safe than sorry.  Hope you enjoyed this one, thanks for stopping by!